Checklist for Downsizing to a Tiny Home
Six-step checklist for moving into a tiny home: set goals, declutter, design a compact layout, choose a build, sort zoning/finances, and plan your move.
Nomad Adjacenta month ago
Checklist for Downsizing to a Tiny Home
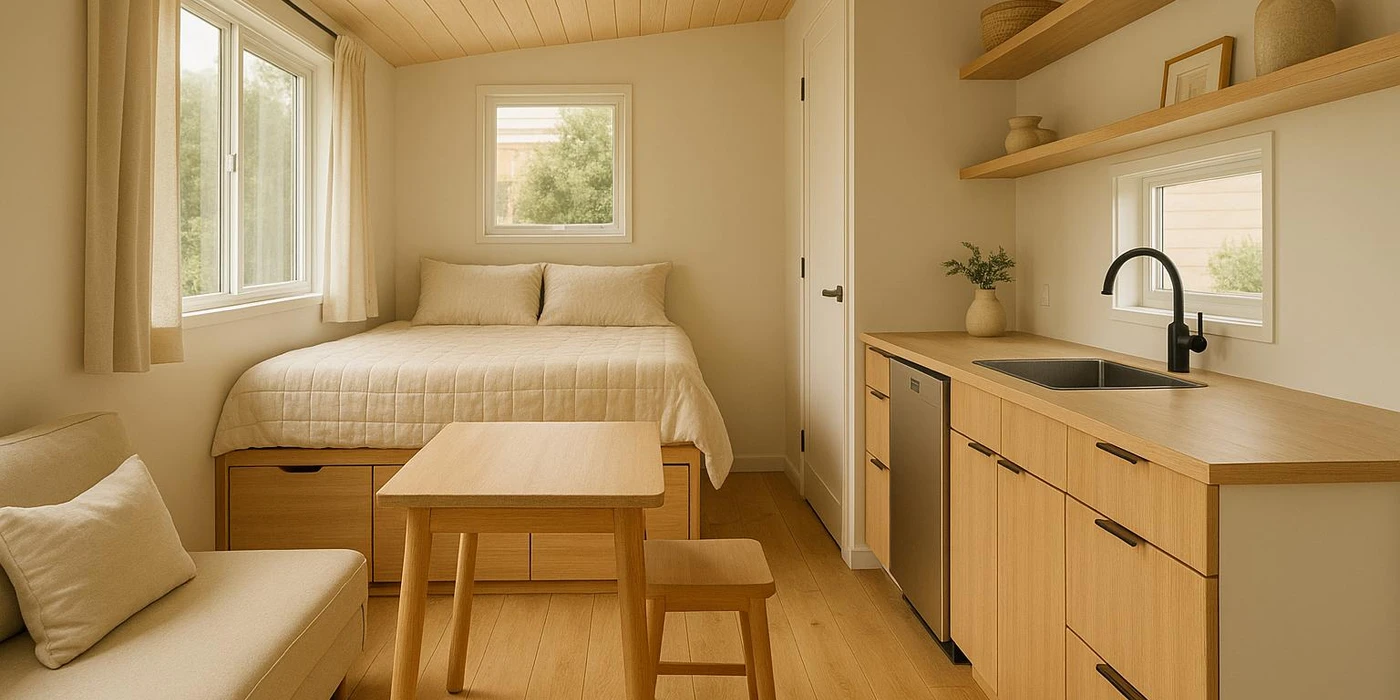
Making the move to a tiny home - typically under 400 square feet - requires careful planning and a shift in how you approach space, belongings, and daily living. Here’s a quick rundown of what you need to know:
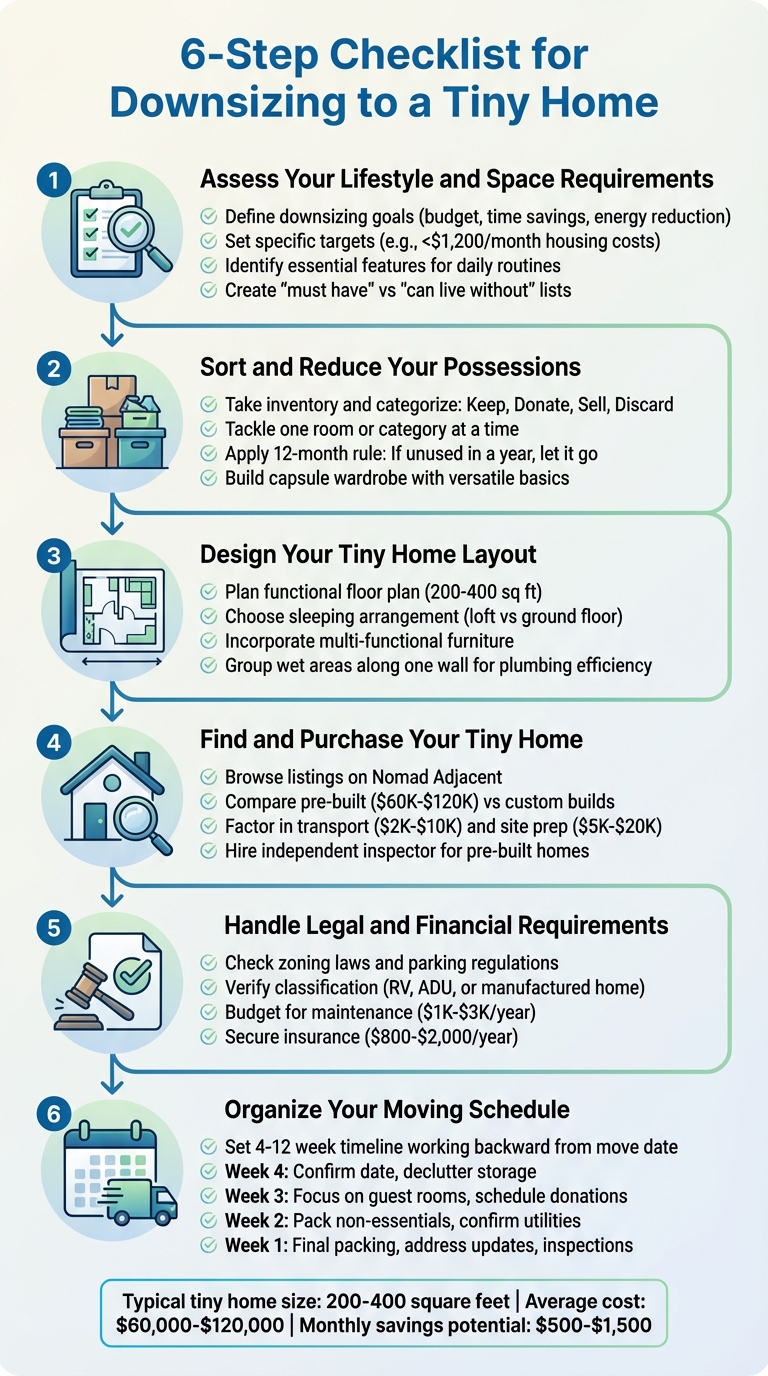
- Define Your Goals: Decide why you’re downsizing - lower costs, simpler living, or more flexibility - and set specific targets like monthly housing budgets or energy savings.
- Declutter: Take inventory of your belongings, sort them into keep, donate, sell, or discard categories, and focus on essentials. Use strategies like the KonMari method or the 12-month rule to streamline.
- Plan Your Layout: Design a functional floor plan that prioritizes your daily needs. Consider multi-use furniture, efficient storage, and utility setups.
- Find the Right Tiny Home: Explore platforms like Nomad Adjacent for pre-built homes, custom builds, or DIY kits. Compare options based on size, cost, and whether you need a permanent or mobile setup.
- Handle Legal and Financial Details: Check zoning laws, parking regulations, and insurance requirements. Budget for purchase, setup, and ongoing maintenance.
- Organize Your Move: Set deadlines for decluttering, packing, and utility setups. Create a move-in checklist to ensure nothing is overlooked.
With the right preparation, you can transition smoothly into a tiny home and enjoy the benefits of a simpler, more intentional lifestyle.
6-Step Checklist for Downsizing to a Tiny Home
Step 1: Assess Your Lifestyle and Space Requirements
Define Your Downsizing Goals
Start by pinpointing why you're drawn to tiny home living. Common reasons in the U.S. include cutting housing costs, reducing debt, simplifying daily life, and minimizing environmental impact. Many tiny homeowners aim to slash their housing expenses significantly, freeing up money to pay off student loans or build an emergency fund.
Turn these broad motivations into specific, measurable goals. For instance, you might aim to keep housing costs under $1,200 a month, limit daily cleaning to 15 minutes, or cut electricity usage by half. These concrete targets will help guide your decisions.
Ask yourself focused questions: What’s my ideal monthly housing budget? How small of a space can I realistically live in? Do I want a stationary home or one I can move around? What do I hope to gain - more time, financial freedom, opportunities to travel, or increased flexibility? These answers will act as a filter for your choices.
Once you’ve clarified your goals, you can identify the features that are absolutely essential.
Identify Essential Features
Using your goals as a foundation, make a list of the spaces and functions your tiny home must include. Start with the basics - things you use every day, like a comfortable bed, a simple kitchenette, a bathroom, and a place to relax. Prioritize features that directly affect your health, income, or safety, such as an ergonomic workspace if you work remotely or accessibility features if needed.
Think about your weekly routines - working, cooking, exercising, or hobbies - and use them to determine your must-haves. For example, someone working remotely full-time might prioritize a well-lit desk, while a compact shower could replace a bathtub to save space. A home cook might insist on a two-burner stove and some counter space but compromise on open shelving instead of upper cabinets. If you have pets, consider their needs, like space for crates or litter boxes, and whether nearby outdoor areas suit their exercise requirements.
To organize your priorities, create two lists: "must have" and "can live without". This will help you weigh trade-offs as you design or select a tiny home. Be ready to swap out oversized items for compact or multifunctional alternatives if necessary. Exploring tiny home listings on platforms like Nomad Adjacent can give you ideas about layouts and features - such as comparing 20-foot versus 28-foot homes, loft versus ground-floor sleeping, or large kitchens versus minimal setups. This research can help you refine your list of essentials.
These priorities will shape your furniture choices, layout design, and ultimately your tiny home selection.
HOW TO GET STARTED DOWNSIZING FOR YOUR TINY HOUSE
Step 2: Sort and Reduce Your Possessions
Once you’ve identified the essentials for your tiny home, it’s time to pare down your belongings.
Take Inventory and Categorize
Start by listing everything you own - clothing, kitchenware, furniture, electronics, tools, decor, sentimental keepsakes, outdoor gear, and more. Create four categories: keep, donate, sell, and discard/recycle. As you go through your items, assign each to one of these groups based on your tiny home’s space limitations and your priorities.
Use simple labels like “K” for keep, “D” for donate, “S” for sell, and “T” for trash. This system makes it easy to track decisions and avoids items sneaking back into your living space. For the items you’re keeping, measure their size to ensure they’ll fit comfortably in 200–400 square feet. For items to sell, note their estimated value and where you’ll sell them, like Facebook Marketplace or a yard sale. For donations, research local charities and their pickup options.
To preserve memories, photograph sentimental or valuable items before letting them go. Set aside a staging area - perhaps a spare room or part of the garage - where you can physically separate donations, sale items, and trash. This visual progress can be motivating as you see those piles shrink.
Tackle One Room or Category at a Time
You can approach decluttering by room or by category, depending on what works best for you. A room-by-room approach gives you quick, visible progress. Start with low-stress areas like the bathroom or pantry before moving to more emotional spaces like the bedroom or garage. Alternatively, a category-based approach (similar to the KonMari method) lets you see all of a particular type of item at once, helping you grasp just how much you own. For example, gather all your clothing into one pile and sort it before moving on to books, kitchenware, or sentimental items.
Set limits for each category based on your tiny home’s storage capacity. For example, decide on a specific number of outfits, dishes, or storage bins that will fit in your new space. To stay focused, allocate a set amount of time for each category. When sorting clothes, use the 12-month rule: if you haven’t worn it in a year, it’s time to let it go. Build a streamlined capsule wardrobe with versatile, mix-and-match basics that work across seasons.
In the kitchen, eliminate duplicates like extra spatulas or multiple sets of measuring cups. Keep only one high-quality version of essential tools and say goodbye to single-use gadgets you rarely use. For furniture, measure your tiny home layout and keep only pieces that fit, serve a daily purpose, and ideally offer extra functionality, like a sofa-bed or a table with storage drawers. Sentimental items can be especially tricky - limit yourself to one small bin per person and prioritize items with the most emotional or historical significance. For less critical keepsakes, consider creating a digital archive by photographing items like children’s artwork or collections.
Stick to Minimalist Principles
Once you’ve sorted your possessions, apply minimalist guidelines to finalize what stays.
Keep only what sparks joy, has been used in the last 6–12 months, and fits within your tiny home’s limited space. The KonMari method can be especially helpful for tackling emotional attachments and preventing clutter from creeping back in.
Adopt the “one in, one out” rule: for every new item you bring into your home, one must go. Start practicing this habit now to avoid future clutter and maintain balance in your tiny home.
Step 3: Design Your Tiny Home Layout
Creating a layout for your tiny home, typically between 200–400 square feet, is where practicality meets creativity. This step connects your pared-down belongings with a living space that works for your daily life.
Plan a Functional Floor Plan
Start by thinking about how you live day-to-day. List your activities - cooking, working, exercising, caring for pets, or pursuing hobbies - and assign a space for each. This ensures you don’t miss essential zones like a workspace or storage for hobby equipment.
Deciding on your sleeping arrangement early is crucial. If climbing a ladder to a loft doesn’t suit you - whether due to mobility concerns, sharing the space with pets, or planning to stay in the home long-term - a main-floor bedroom might be a better choice. Keep in mind that lofts usually have only 3–4 feet of headroom, which can make them less practical for full-time sleeping.
Make sure to leave clear pathways - at least 24–30 inches wide - from the entry to key areas like the kitchen, bathroom, and bedroom. Open layouts work well for tiny homes, and avoiding bulky furniture will help maintain an airy feel.
To get the most out of your space, consider multi-functional furniture like Murphy beds or foldable tables. Also, don’t overlook hidden storage opportunities. For example, stair risers and toe-kick drawers can offer extra storage, while shallow shelves built between wall studs (normally spaced 16 inches apart) can hold smaller items. Designing storage solutions around specific belongings - whether it’s a guitar, camera gear, or a pet crate - ensures everything has its place.
Instead of dividing the home into separate rooms, think in terms of zones. Subtle changes in ceiling height, lighting, or flooring can help define areas for cooking, working, and relaxing without adding walls.
Determine Storage, Utility, and Power Needs
Once your floor plan is set, focus on the technical details.
To simplify plumbing and water management, group wet areas - like the kitchen, bathroom, and laundry - along one wall. This reduces the complexity of your plumbing system and keeps costs down.
Plan your utilities early. If you’re connecting to the grid, set aside space near an exterior wall for the electrical panel and hookups. For off-grid living, make room for batteries, inverters, and charge controllers in a ventilated area. A small solar setup with 1–2 kW of panels, an inverter, and batteries typically costs between $5,000 and $10,000 installed. Composting toilets designed for tiny homes usually range from $900 to $1,500.
Think about your energy needs by listing all your lighting, appliances, and devices. For off-grid setups, most tiny homes require systems between 1–5 kW, depending on your lifestyle. If your tiny home is on wheels, be mindful of weight distribution. Place heavy items like appliances, water tanks, and batteries low and near the trailer axles. For safe towing, aim for a tongue weight that’s 10–15% of the total trailer weight.
Don’t forget safety. Even in areas with flexible regulations, it’s wise to include an egress window in the primary sleeping area, guardrails for lofts, and properly sized stairs. Make room for smoke and carbon monoxide detectors, accessible shutoff valves, and other essential safety features.
sbb-itb-718b9e4
Step 4: Find and Purchase Your Tiny Home
Once you’ve nailed down your layout and technical requirements, it’s time to hunt for a tiny home that fits your budget and lifestyle. This step builds on your simplified design and streamlined living goals.
Start by outlining your search criteria. Set a realistic budget in USD, decide between a tiny house on wheels or one with a permanent foundation, and determine if you prefer on-grid or off-grid systems. Think about the size you need - 200–300 square feet is ideal for solo living, while 350–450 square feet works better for couples. Finally, focus on U.S. regions with zoning laws that accommodate tiny homes.
Browse Tiny Home Listings on Nomad Adjacent
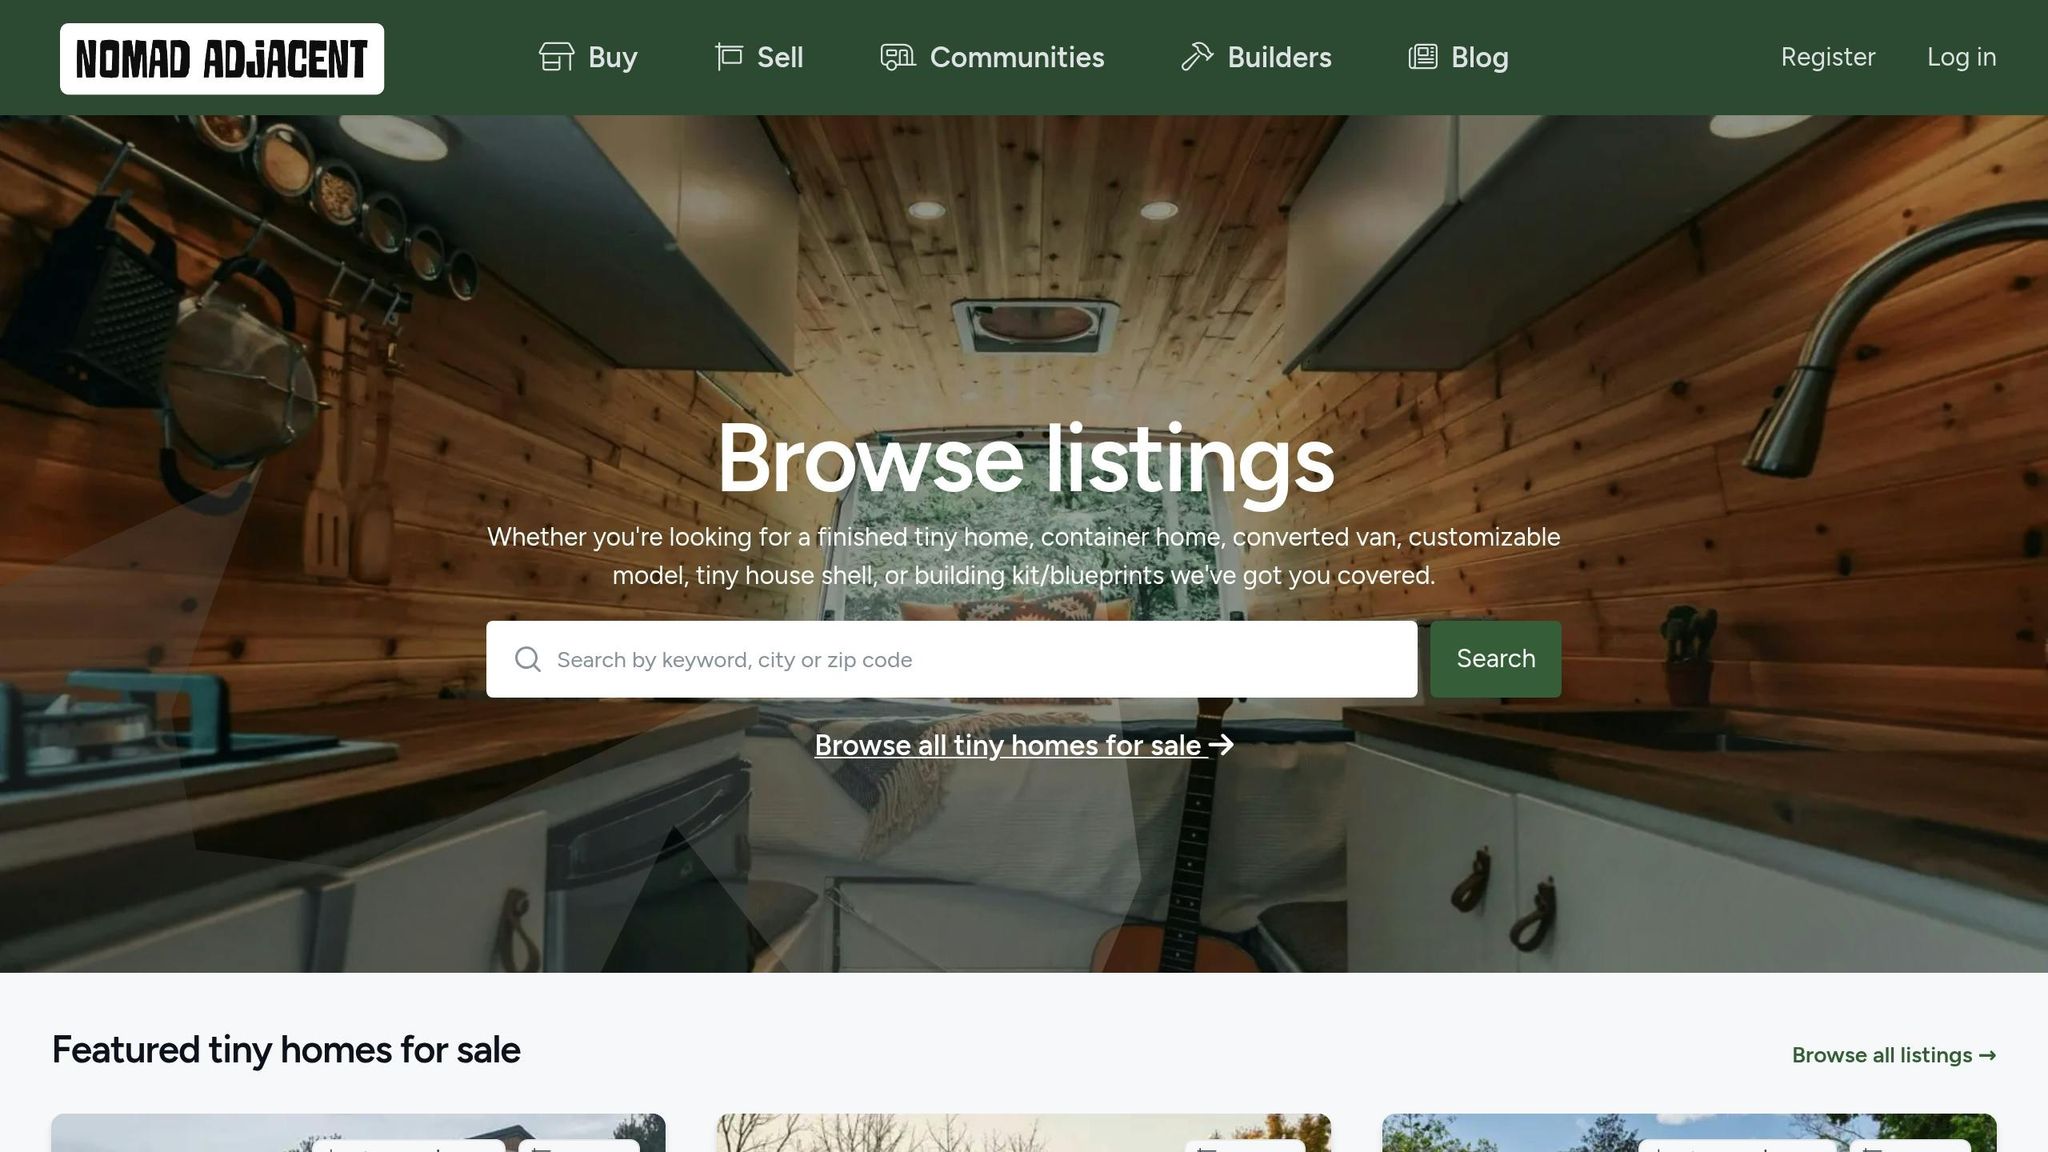
Nomad Adjacent is a free platform tailored for non-traditional housing, including tiny homes, converted vans, RVs, container homes, movable cabins, and building kits. Its map-based search makes it easy to zero in on areas near your job, healthcare, or other essential services. Filters allow you to refine your search by home type (e.g., wheels or foundation), price range, square footage, and more, saving you from sifting through irrelevant listings. This platform is a great resource for finding compact, energy-efficient homes that align with your minimalist lifestyle.
As of December 2025, Nomad Adjacent featured a variety of tiny homes across the U.S., such as:
- A 285 sq. ft. certified tiny home in Jacksonville, FL for $60,000
- A Timbercraft Teton model in Guntersville, AL listed at $144,750
- A 32-foot luxury model in San Diego, CA priced at $159,957
- A 768 sq. ft. Amish-built movable cabin in Reed City, MI for $71,000
When evaluating listings, dig into the build details. Check the year it was built, the builder’s reputation, and specifications like framing and insulation. Review the utility setup - does it offer 30A or 50A electrical, solar capabilities, or water and sewer solutions? For towable units, confirm the weight and dimensions to ensure your vehicle can tow it safely. Request photos or videos of critical areas like under-sink plumbing, the roof, and trailer frames. Don’t shy away from asking sellers about repairs, water damage, or DIY modifications. Nomad Adjacent also provides resources and articles to guide you in evaluating different types of alternative housing.
Compare Custom Builds and Pre-Built Options
After narrowing down your options, it’s time to weigh the pros and cons of custom builds versus pre-built homes. Your choice will depend on your budget, timeline, and lifestyle priorities.
Pre-built tiny homes, especially used ones, are often ready to move within weeks, making them a solid choice if you’re on a tight schedule. They’re usually less expensive upfront than custom builds, particularly if the home is older or needs minor cosmetic fixes. However, you’ll have limited control over the design and may have to work around someone else’s layout choices. Whenever possible, prioritize certified and professionally built models and hire an independent inspector familiar with tiny homes or RVs to assess the property before finalizing your purchase.
Custom builds, on the other hand, offer the flexibility to design a home that perfectly suits your needs. Whether it’s a ground-floor bedroom, built-in workspaces, or systems optimized for specific climates or off-grid living, you can tailor every detail. Professionally built custom tiny homes in the U.S. typically cost between $60,000 and $120,000 for 200–400 square feet with standard finishes, while high-end builds can exceed $150,000. Keep in mind, custom builds often take several months and require active involvement in design, zoning approvals, and other logistics. When choosing a builder, look for a strong portfolio of completed projects, positive client reviews, and experience building for your climate. Ask about their materials, construction methods, and how they handle warranties and post-build support. Always insist on a detailed written contract that outlines the scope of work, materials, payment schedule, timeline, and policies for cost overruns.
Beyond the sticker price, don’t forget additional expenses like transport and delivery costs (which vary based on distance), site preparation (gravel pads, utility hookups, or concrete piers), and connection fees for utilities or off-grid systems. While custom builds with higher-quality materials may save on energy and maintenance costs over time, some pre-builts might require immediate repairs. For example, compare a $75,000 used pre-built home needing repairs to a $100,000 custom build designed for energy efficiency. Factoring in these details will help you make a well-informed decision.
Step 5: Handle Legal and Financial Requirements
Before you settle into your tiny home, it’s crucial to address the legal and financial details. Zoning laws, parking regulations, and insurance requirements can vary widely across the U.S., and missing these steps could lead to fines or even force you to relocate.
Check Zoning Laws and Parking Regulations
Start by determining how local authorities classify your tiny home - whether it’s considered an RV, manufactured home, or accessory dwelling unit (ADU). Each classification comes with its own set of rules regarding where you can park or build, how much square footage is required, and whether full-time living is allowed. Check your city or county planning department’s website for ordinances related to ADUs, tiny homes on wheels, or modular homes.
Parking regulations depend on your home’s type. For example, stationary tiny homes built on foundations usually follow standard residential zoning rules, which might include foundation permits and utility hookups. On the other hand, tiny homes on wheels are often treated as RVs, meaning they’re typically restricted to RV parks or temporary parking areas. In some places, you might be limited to parking for up to 180 days without permanent residency approval. These rules can vary significantly by state and locality, and violations can lead to fines as steep as $1,000 per day. To avoid any issues, get written confirmation from your local planning department that your setup complies with zoning and building codes.
For additional help, tools like the American Tiny House Association’s zoning map or Nomad Adjacent’s map-based search can help identify areas with favorable zoning. You might also want to see if your state has adopted Appendix Q of the International Residential Code (IRC), which applies to tiny houses under 400 square feet.
Once you’ve ensured your home is legally compliant, it’s time to figure out the full financial picture.
Budget for Purchase, Maintenance, and Insurance
Owning a tiny home involves more than just the purchase price. Be sure to account for transport and delivery costs, which can range from $2,000 to $10,000, as well as site preparation expenses that could fall between $5,000 and $20,000. If you’re buying land or planning to park in an RV park or tiny home community, include those costs in your budget too.
You’ll also face ongoing expenses. General maintenance, such as roof repairs or plumbing, can cost $1,000–$3,000 annually. Utilities like electricity or propane (for off-grid homes) might run $500–$1,500 per year, while property taxes could add another $500–$2,000 annually, depending on your home’s value and location. For tiny homes on wheels, plan for an extra $500 each year for tires and brakes, and set aside 1–2% of your home’s value annually for repairs.
Insurance is another key consideration. Tiny homes on wheels often require RV-style policies, costing about $1,000 annually for comprehensive coverage on a $50,000 home. Stationary homes are usually covered under homeowners or manufactured home policies, though you might need a special endorsement. Specialized tiny home insurance is also available, with rates ranging from $800 to $2,000 per year for structural coverage, $300–$600 for liability, and $200–$400 for contents. Companies like Progressive or State Farm may offer policies starting at around $35 per month, but rates depend on factors like location and potential risks such as flooding. Experts recommend at least $100,000 in liability coverage, especially for homes on wheels, to cover potential risks during transit.
To stay on top of your finances, consider using budgeting tools like Mint or YNAB to forecast your expenses. A good rule of thumb is to keep total housing costs under 30% of your income. Financial advisors from the Tiny House Financial Coalition suggest making a 20% down payment and maintaining an emergency fund that covers six months of expenses, which typically amounts to $10,000–$20,000. A sample budget might allocate 50% for the purchase, 20% for setup costs, 15% for insurance and maintenance, 10% for utilities, and 5% for taxes. Careful planning can help you avoid common pitfalls, such as assuming RV status allows for permanent living (illegal in many counties) or failing to check HOA rules that may prohibit non-traditional homes.
Step 6: Organize Your Moving Schedule
Now that you've sorted out the legal and financial details, it's time to focus on the logistics of your move. A well-organized timeline with clear deadlines for each task will keep you on track as you shift from a larger home to your tiny space. Planning ahead ensures a smoother transition into your new, compact lifestyle.
Set Deadlines for Decluttering and Packing
Start by working backward from your move-in date, setting deadlines for each major step. Ideally, plan your move over a 4–12 week period, beginning with confirming your move date and booking services. Follow this with systematic decluttering, category by category, then packing, and finally tackling utility setups and address updates. To stay flexible, include at least one buffer week to handle delays, whether it’s selling items, paperwork issues, or transport hiccups.
For a more detailed breakdown, consider a four-week countdown:
- Week 4: Confirm your move date with movers or towing services. Declutter storage spaces, list larger items for sale, and pack rarely used things like holiday decorations or spare linens.
- Week 3: Focus on guest rooms, home office items, and hobbies. Confirm your parking spot, utility hookups, or off-grid systems. Schedule donation pickups and bulk trash removal.
- Week 2: Narrow down your kitchenware and wardrobe to the essentials you’ll use in your tiny home. Pack non-essential kitchen items and off-season clothing. Confirm utility start dates and internet setup.
- Week 1: Pack everything except a small daily-use kit. Clean your old home, complete any inspections or walk-throughs, and personally move important documents, valuables, and essentials. Double-check utilities and address changes are active.
As you pack, stick to the minimalist approach from Step 2. Keep only one version of items you use regularly and ensure everything will fit comfortably in a space under 400 square feet. Use labeled boxes for "keep", "sell", "donate", "recycle", or "trash" to stay organized. Pack strategically: start with long-term storage or seasonal items, then occasional-use items, and finish with daily essentials. Don’t forget to weigh your trailer to ensure it stays within safe limits.
Arrange Utility Connections and Address Updates
With your packing schedule in place, turn your attention to utilities and address changes to ensure everything is ready for move-in day.
Schedule connections for electricity, water, sewer/septic, gas, internet, and trash pickup at least three weeks in advance. This allows time for meter installations, inspections, and any necessary permits. Once you have a confirmed site address and move-in date, contact your service providers immediately.
Address updates depend on whether your tiny home has a fixed parking spot or is more mobile. If you’re staying in a designated location like a tiny-home community, leased lot, or owned land, use that as your residential address for USPS change-of-address requests, driver’s license updates, voter registration, and tax records. For a more mobile setup, consider a mail forwarding service or P.O. box, and ensure you have a physical address that meets state ID requirements. Check with your state DMV for licensing and registration rules. Notify key organizations in this order: banks, credit cards, insurance providers, employers or clients, healthcare providers (including prescriptions), subscriptions, online retailers, and other key contacts. Start 2–3 weeks before your move, and monitor your mail for 1–2 months afterward to catch anything you missed.
Some often-overlooked but important tasks include:
- Confirming parking permissions and zoning rules are approved, including HOA regulations, setback requirements, and stay-duration limits.
- Scheduling on-site inspections for electrical or sewage hookups if required by local codes.
- Verifying your insurance coverage for both your tiny home and liability at the new site.
- Preparing a move-in tool kit with essentials like a drill, level, wrench set, extension cords, hoses (water and sewer), wheel chocks, and leveling blocks.
- Backing up and securely storing digital copies of important documents such as IDs, titles, warranties, and tiny home build records.
To stay on top of everything, create a move-day checklist - either printed or digital - that includes these smaller but crucial tasks. This will help you avoid last-minute surprises and keep the final 48 hours stress-free.
Conclusion
Downsizing to a tiny home isn’t just about moving into a smaller space - it’s about rethinking how you live, what you value, and how you use your resources. By following the steps outlined, you’re preparing for a lifestyle that prioritizes simplicity, reduces clutter, and helps you make the most of every square foot. The goal isn’t to feel like you’re giving things up but to embrace a new way of living that feels intentional and fulfilling.
As you prepare for this transition, focus on practical steps to make the move smoother. Measure your new space carefully to ensure your belongings will fit. Opt for multi-functional furniture and digitize important documents to save space. You might find methods like the KonMari approach helpful - keeping only items that serve a purpose or bring you joy. Don’t forget to check zoning laws, utility setups, and insurance details before moving day. These small but crucial steps will save you a lot of hassle later.
It’s also worth noting that the decluttering process might spark some disagreements, especially with family members. However, many people find that once they adjust, the rewards of living with less far outweigh the initial challenges. Space constraints will force you to make tough calls about what to keep, so maintaining a “less is more” mindset even after you’ve moved in will be key. If the idea of going tiny feels overwhelming, you could ease into it by first downsizing to a slightly smaller home before making the leap to a tiny house.
When it’s time to find your perfect tiny home, Nomad Adjacent is a great place to start. Their map-based search tool lets you explore listings that match your needs and budget. Whether you’re looking for a pre-built model, a custom build, or a DIY kit, you’ll find plenty of options to suit your plans. Plus, their free listing service and resources on minimalist living can guide you every step of the way, from planning to purchase. With the right preparation and mindset, you’ll be ready to embrace your new minimalist lifestyle with confidence.
FAQs
What should I know about the legal requirements for parking a tiny home?
When deciding where to park a tiny home in the U.S., it's essential to familiarize yourself with local zoning laws and building codes, as these rules differ widely across cities and states. Some locations may not allow tiny homes on wheels to serve as permanent residences unless you obtain specific permits. Additionally, zoning regulations might restrict parking options, such as banning residential use on certain types of land.
In many instances, tiny homes are categorized as RVs, which come with their own regulations governing where they can be parked and for how long. To avoid any legal issues, reach out to your local government to confirm the rules, ensure you're meeting all requirements, and secure any permits needed.
What’s the best way to declutter before moving into a tiny home?
When preparing for tiny living, start by organizing your belongings into four groups: keep, donate, sell, and discard. Prioritize keeping only the items you genuinely use or cherish - space in a tiny home is at a premium.
Let go of non-essential items by donating them to those in need or selling them to earn a little extra cash. This not only lightens your load but also gives your belongings a second life. Additionally, think about clever storage ideas to make the most of your limited space. These steps will help make your move into a tiny home smoother and far less stressful.
What are the key factors to consider when planning a tiny home layout?
When designing your tiny home, focus on making every inch count. Space efficiency and functionality should be at the core of your layout. Consider using multifunctional furniture - a sofa with built-in storage or a dining table that folds away can save both space and hassle. To create a more open and inviting atmosphere, let in plenty of natural light with large windows or skylights.
Pay attention to how you move through the space. A thoughtful layout ensures you can navigate your home comfortably without it feeling cramped. Vertical storage is another game-changer - think shelves, cabinets, or even hanging storage to make the most of your walls. Finally, focus on what matters most to you. Tailor the design to suit your daily routines and lifestyle needs.